
Dissolution is a long-form abstract generative artwork that I released on 26 January 2022. It is comprised of 256 editions, each of which represents a possible output drawn from a very large algorithmic space. This post discusses various aspects of Dissolution, from its inspiration to some of the technical aspects of its creation.
Inspiration
My primary inspiration for Dissolution was The Second Coming, by William Butler Yeats. When I first read the poem, I was struck by its apocalyptic imagery — it gave me a general sense of unease and foreboding. And while the century-old poem originally dealt with religious themes, its language still feels appropriate to me today. I thought of it regularly while working on this project, and included the first stanza directly in the project description.
It took me some time to find a title that I thought did service to the ideas that I had in mind. Eventually I realized that dissolution was close, based on its secondary meanings of disintegration, decomposition, debauchery, and even death.1
Techniques
The core generative algorithm in Dissolution grew out of some experiments in Julia over the span of a day or so, based on the “Destroy a Square” #genuary prompt.2
This underlying algorithm is a variant of recursive subdivision, in which a space is repeatedly broken into smaller parts, which are then also broken into smaller parts, and so on. In this case, a space is recursively altered, and at each step either expanded or reduced. As a result, the bounds can grow or shrink randomly, leading to minimal regularity.
At each step in this algorithm, a rectangle is placed at the current location (based on a variety of factors that influence its color, opacity, etc.) until there are about ten million rectangles placed in the image. The following debug image shows uncolored versions of the rectangles that make up the lead image in this post:
Dissolution debug render of lead image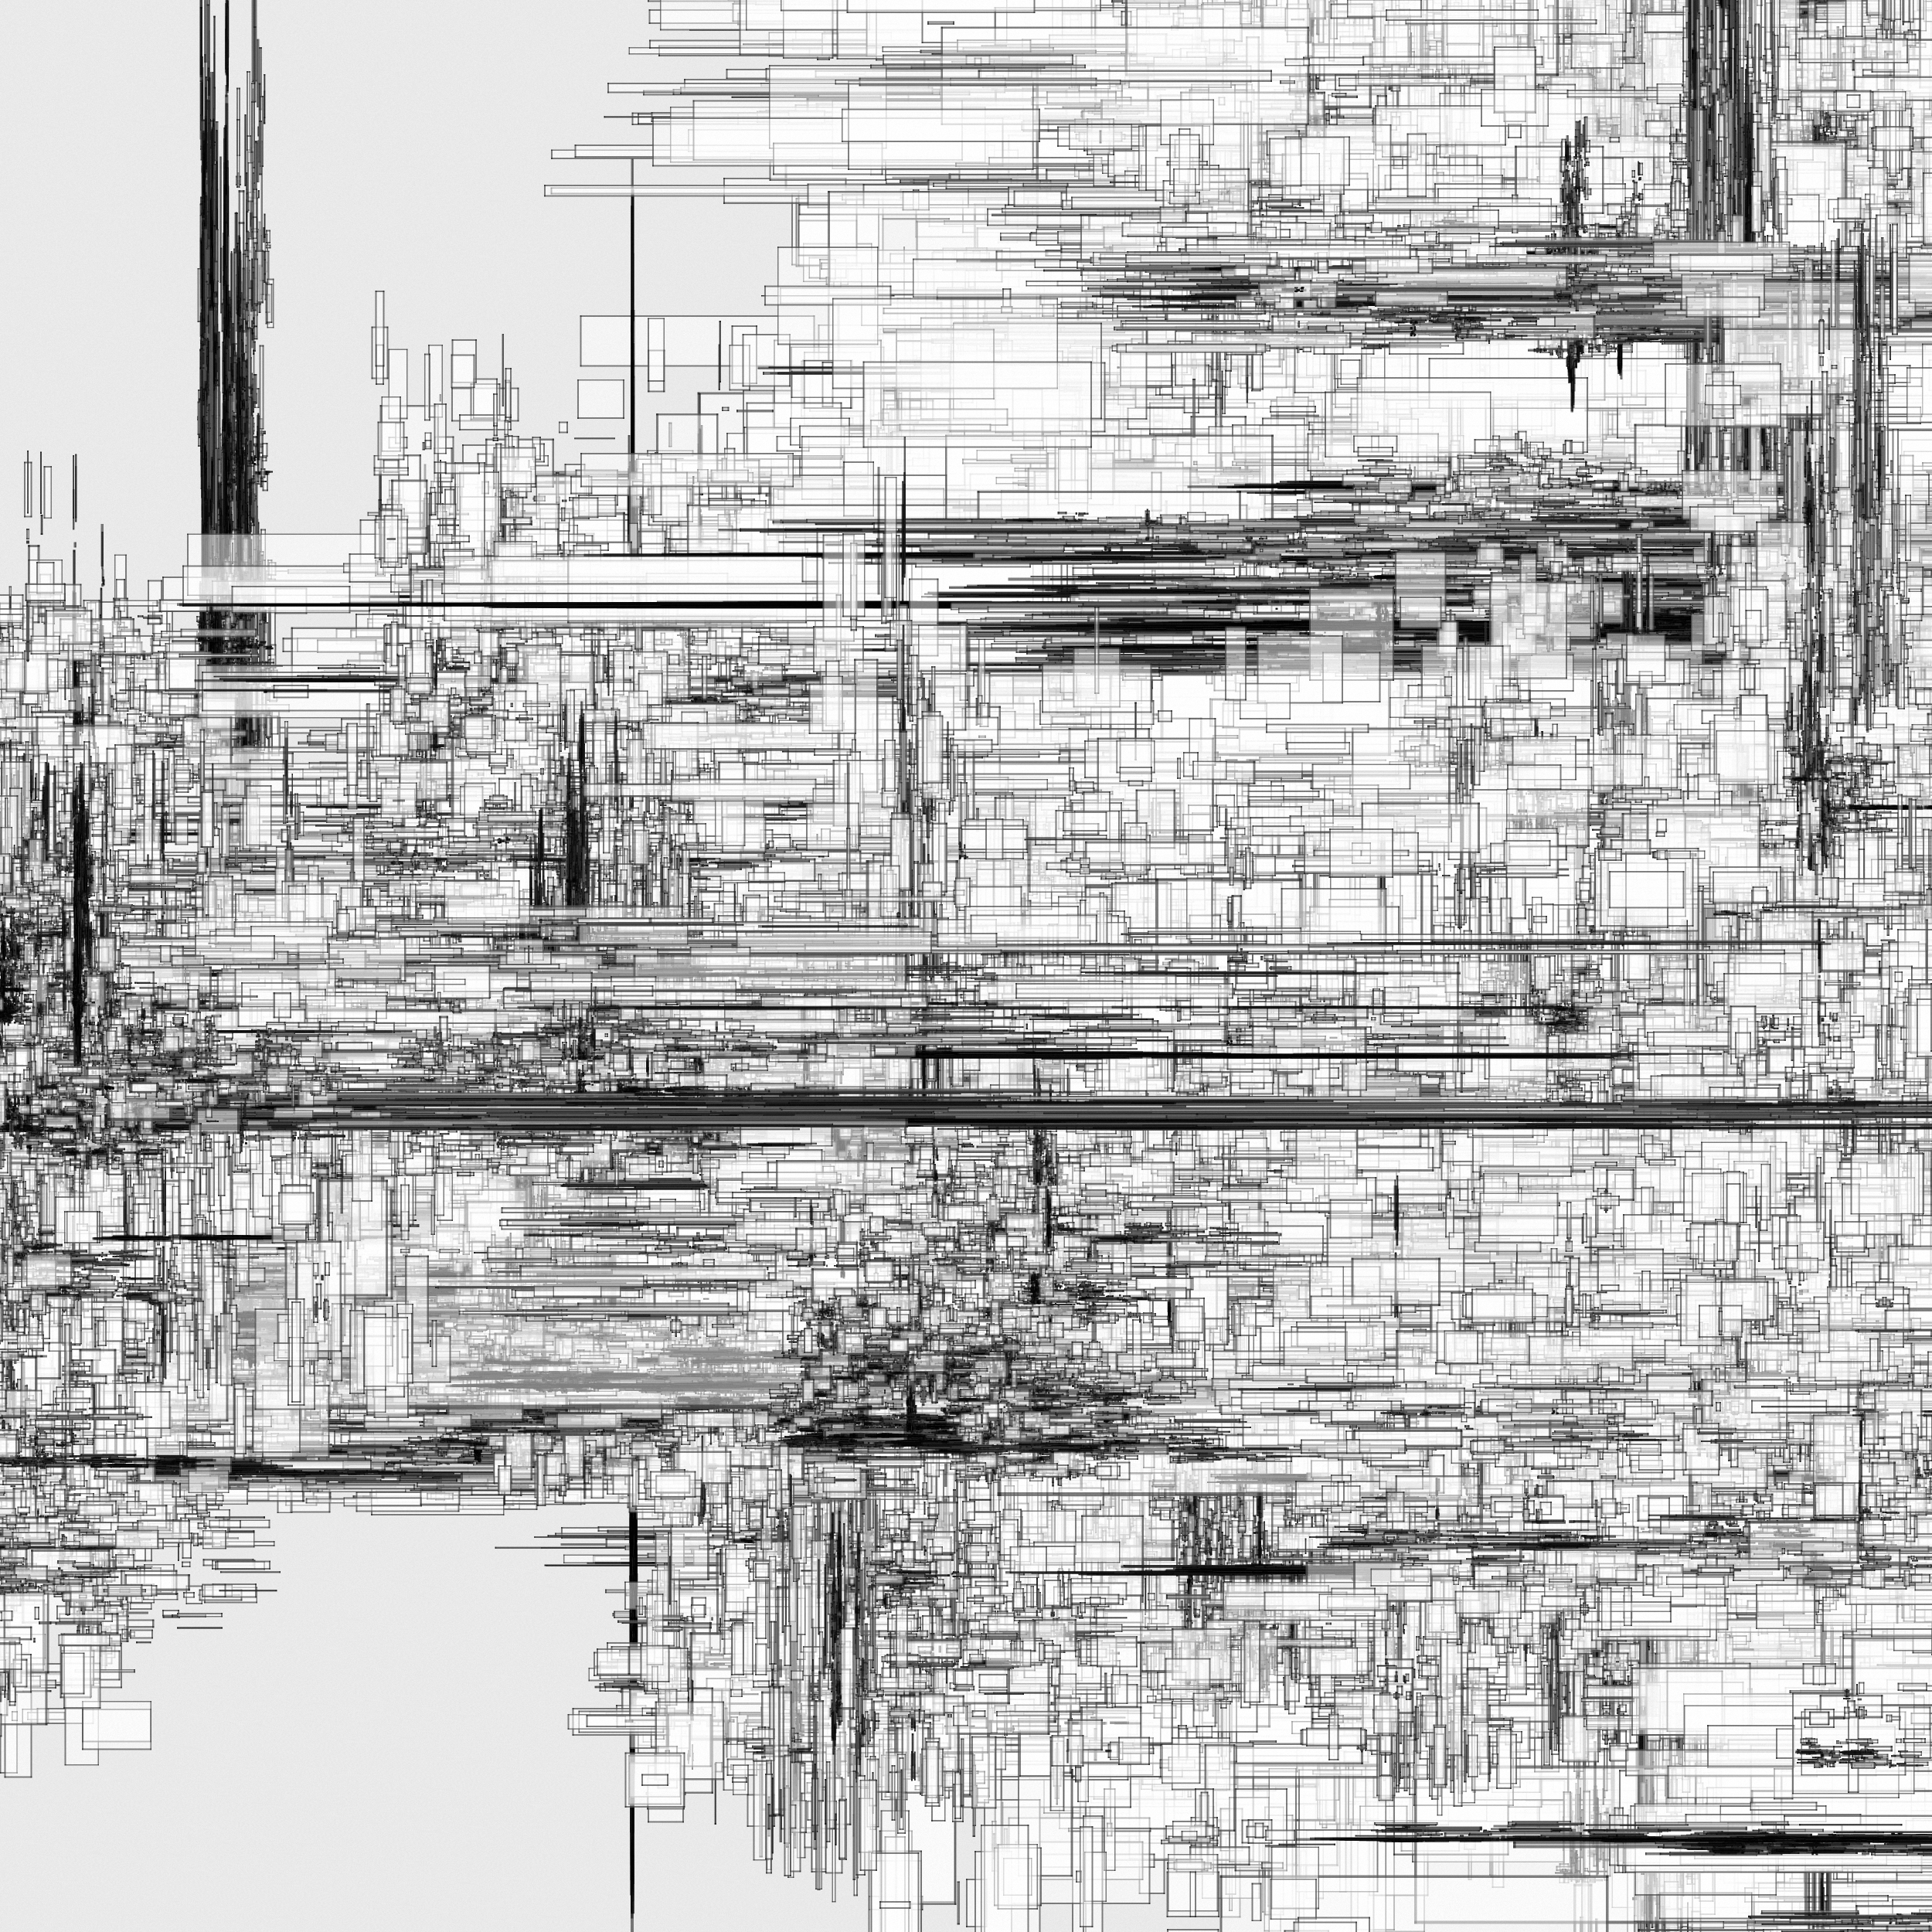
Once this algorithm has completed and all of the rectangle locations have been determined, everything is passed to WebGL for final rendering. Since each rectangle is almost completely transparent, the final rendered image is the accumulated color interactions of these ten million rectangles after they’ve been piled on top of each other.
From Julia to WebGL
Once I had the basics working in Julia, I needed to port everything to Javascript so that it would be compatible with fxhash. After hitting several dead-ends, I realized that I wasn’t going to be able to get the results that I expected without using something significantly more powerful than pure Javascript.
Output from the original Julia implementation of the Dissolution algorithm
Since I already had a working version in Julia that manipulated things at the pixel level, I knew that replicating this in Javascript would be difficult, and that the best tool for the job was probably not Javascript but WebGL. Unfortunately, I had never really used WebGL (WebGL2, specifically), but I knew it would be a very powerful tool to add to my artistic toolbox, so I banged my head against WebGL2 Fundamentals until things started to sink in.
Why WebGL?
You may be wondering why Dissolution requires WebGL. Couldn’t I have drawn ten million rectangles directly with an HTML canvas? Well, yes and no.
You can easily draw hundreds of thousands of rectangles on a canvas and usually everything will be fine. The problem arises when you try to draw overlapping, nearly invisible rectangles (rectangles that have a very low opacity/alpha value). The standard canvas implementation will very quickly start to return odd (or just plain incorrect) images due to a lack of numerical precision.
Let’s take a technical detour for a moment. Feel free to skip the next section if this isn’t your thing.
Color Compositing and Numerical Precision
Most canvas implementations use a 32-bit color representation, where each color channel (red, green, blue, alpha) is typically represented by a single byte, and a byte can represent values from 0 to 255. When colors are combined incrementally, you need to evaluate a color compositing function to understand how the colors blend. The result of this function is stored back into the image after each blend takes place. However, if you want to blend many nearly invisible things, you will very quickly run into limitations resulting from the values that can possibly be stored in a 32-bit color representation. (This is a fairly deep topic, and if you’re interested in learning more about alpha compositing, this is an excellent resource.)
So, in order to work around this lack of numerical precision, you need a higher fidelity color representation — one that can handle mathematical operations on very, very small values. The answer is typically to use floating point numbers. However, if you want to use floating point color channels, your options become limited:
- Implement them yourself using direct pixel color channel manipulation
- Use a library that supports float color arrays
- Use WebGL, which has built-in support for floating point buffers
Perhaps surprisingly, it’s not that difficult to implement on your own.3 However, since this is a very, very low-level operation that will need to take place many billions of times during rendering, it’s critical that it be as fast as possible. Some languages make this easier than others: I can do this in Julia, for example, but Javascript was unable to get things done in a timely manner.
This same performance issue also made it impossible to use this Porter/Duff library I was able to find in the thi.ng umbrella repository.
However, on the WebGL front, not only are floating point buffers supported directly in WebGL2 (via EXT_color_buffer_float), but you get the ridiculous speed benefits of rendering with the GPU. I did some initial testing and was able to get the quality levels I was expecting for millions of rectangles in milliseconds.
WebGL it was.
Colors
In Subdivisions, I generated randomized color palettes from a base hue that was selected at generation time. I did my best to ensure that the color combinations selected would be appealing, but I was slightly disappointed with how they turned out in practice. I hadn’t realized just how attached to specific color palettes I had become, and a random palette generation process made no guarantees about their presence. In retrospect, I should probably have had a selection of fixed palettes and left an allowance for some random palettes.
For Dissolution I pre-created a set of fixed palettes, four for light backgrounds, and six for dark backgrounds. The specific palette used in an edition was chosen as part of the generation process. For each type of background, I also created a set of complementary configurations that would affect the recursive algorithm as well as the possible layout of elements. This was necessary because not all configurations worked with all background/palette combinations.
Examples of all four light color palettes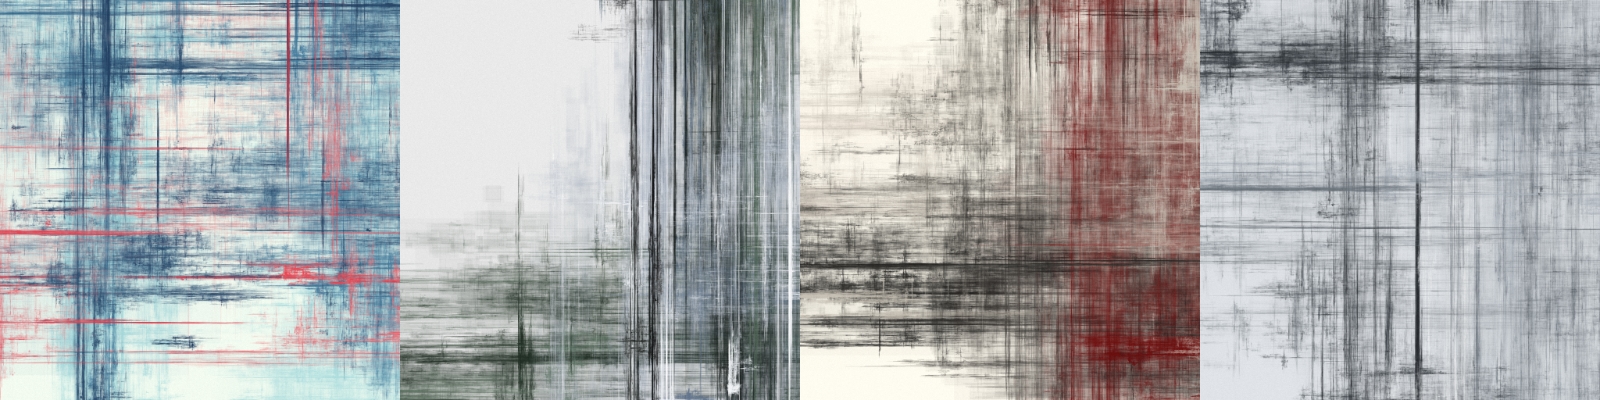
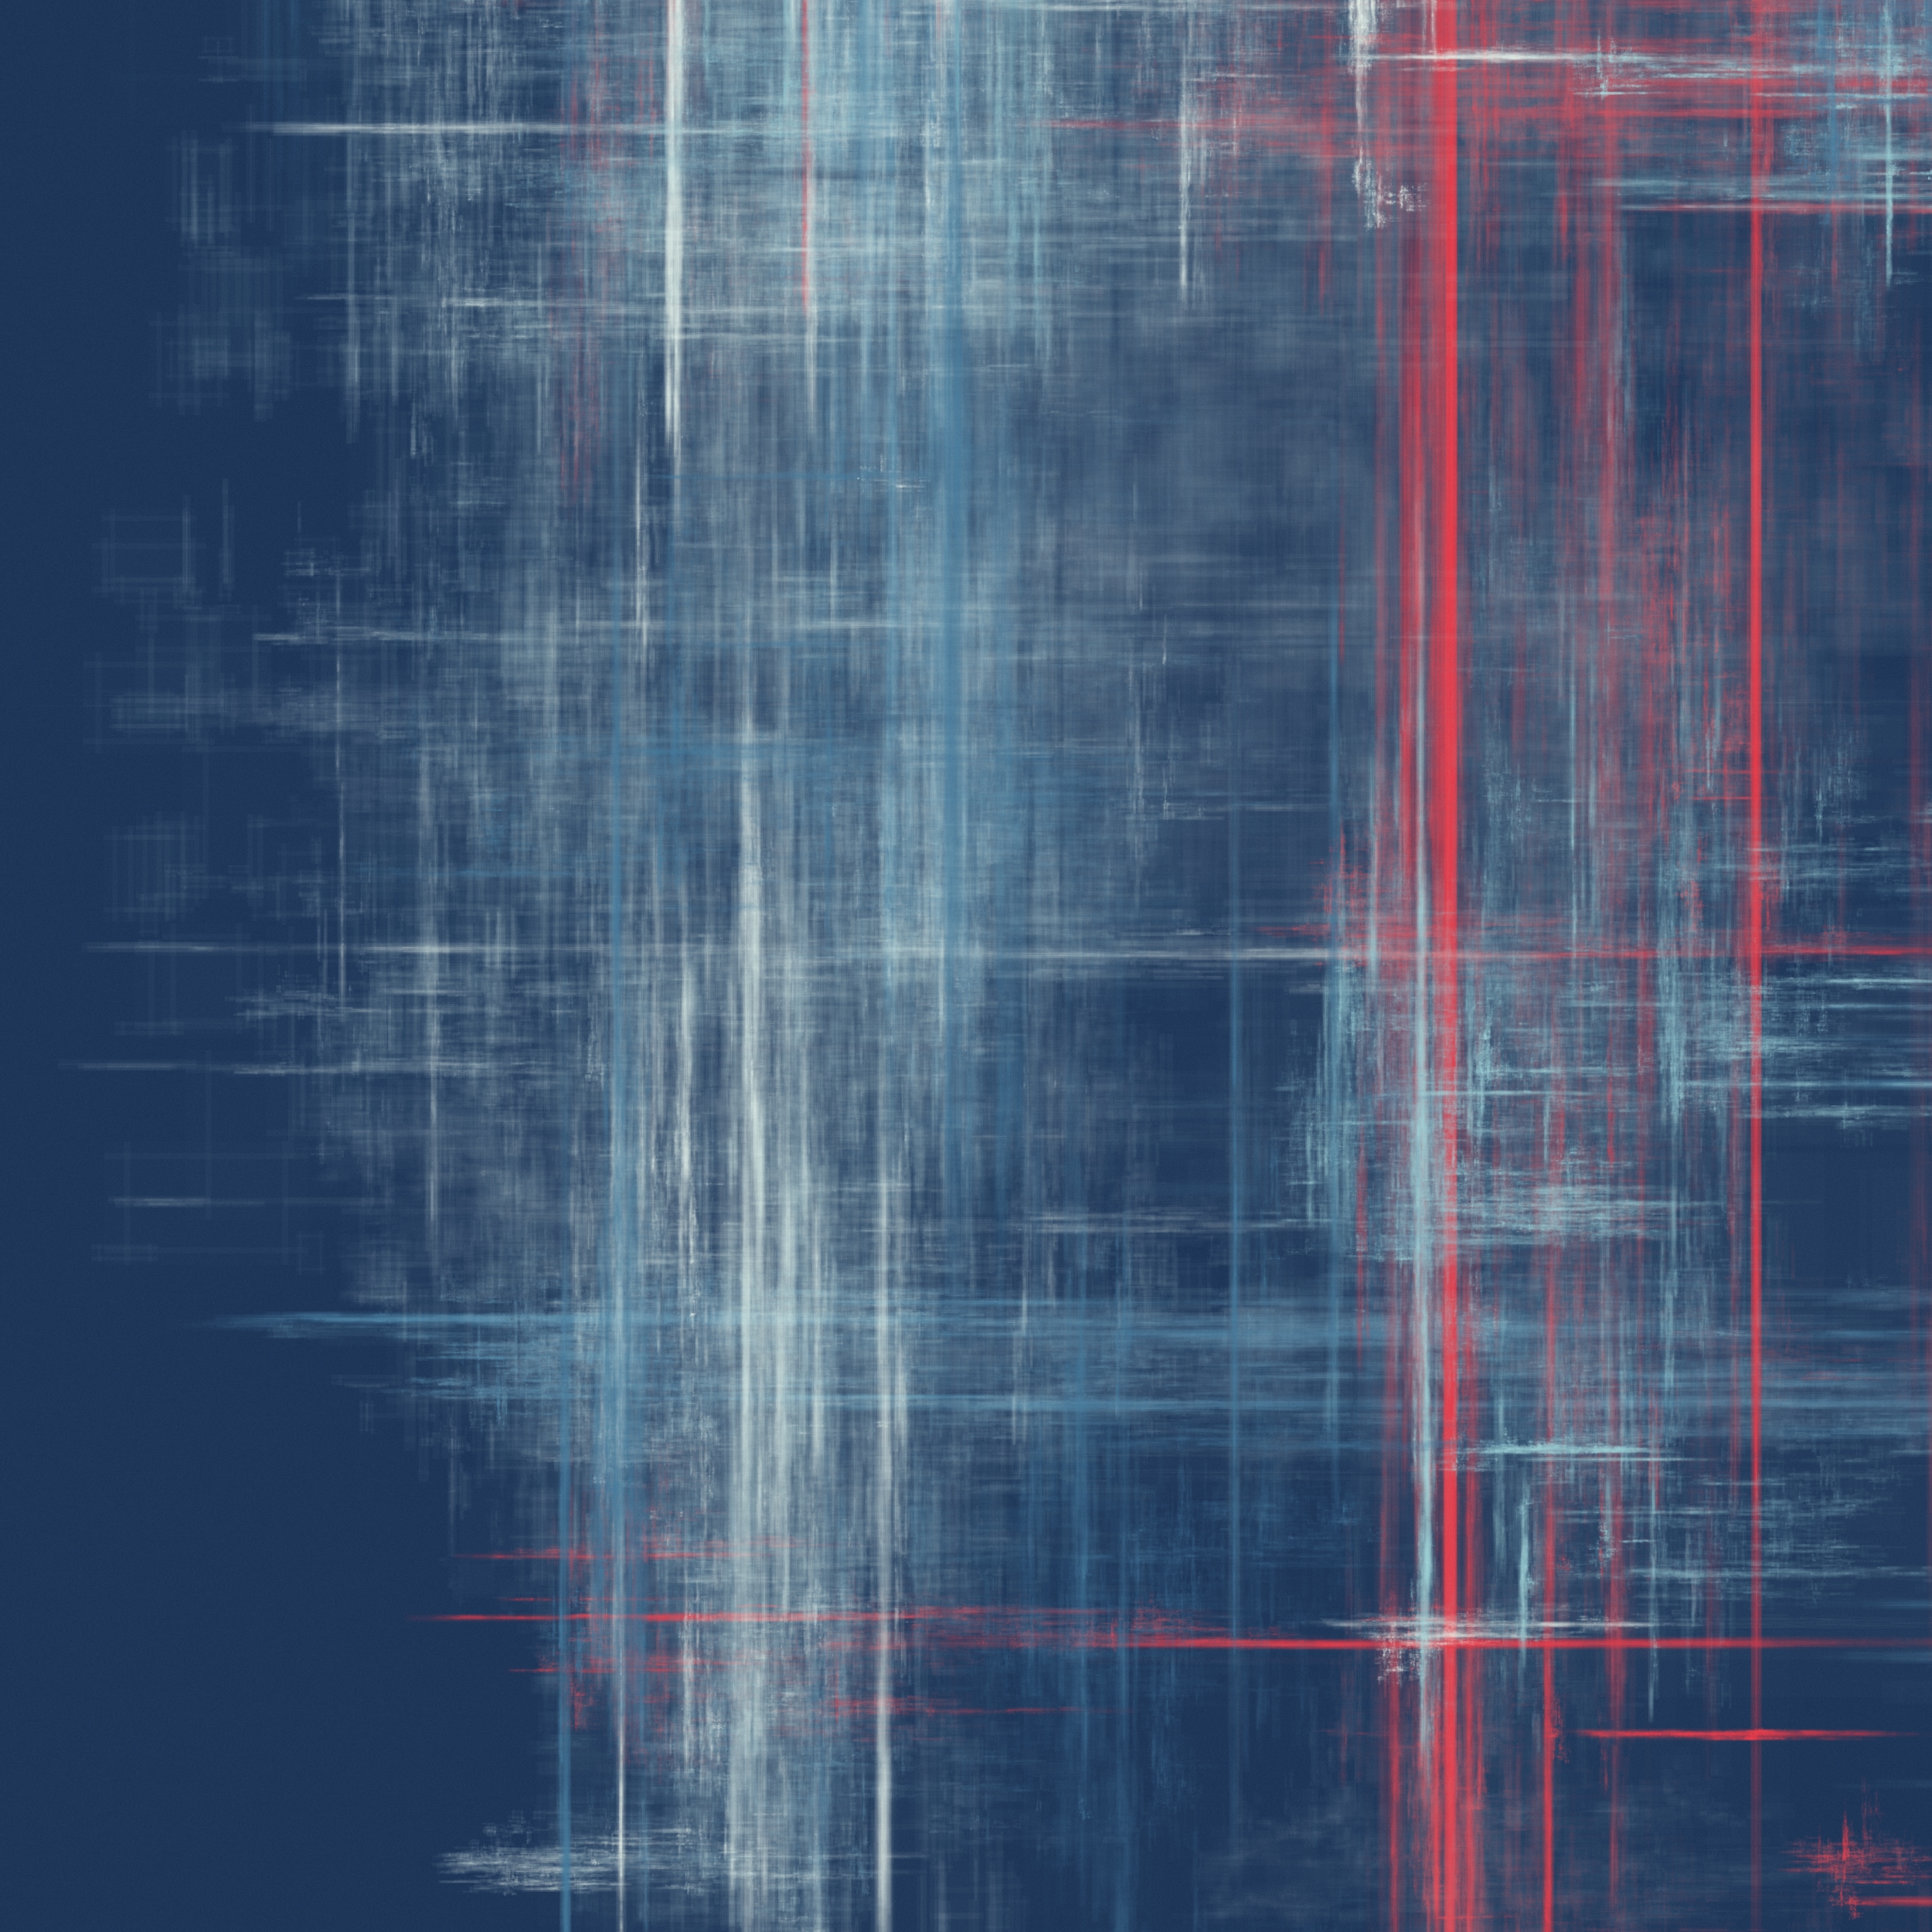
Examples of all six dark color palettes
I find color selection to be one of the most difficult aspects of the generative art process. I often finish the core generative algorithm in days, and then spend several more days/weeks grappling with colors, trying to find a set of colors and color assignment heuristics that play nicely with that core algorithm.
Traits / Features
Dissolution exposes no features to the fxhash UI. Of course, internally there are a set of feature-like decisions that determine the overall shape and feel of an image. These are as follows:
- Background Type: Light or dark
- Palette: Chosen based on background type
- Opacity levels for fills and edges
- Recursion Constraints: A set of constraints on how the core recursive algorithm works:
- How deeply can the algorithm recurse?
- How many points per level of recursion are allowed?
- The minimum rectangle size allowed before the recursive algorithm bottoms out
- Layout: What types of constraints are applied to the starting area during each pass (rectangle or bar)
- Color Selection Algorithm: How are palette colors assigned for each rectangle (based on recursion level, current rectangle count, etc.)?
Because the interactions of these settings are complex, there wasn’t a good way to “featurize” them such that impacts of these choices could be clearly tied to the resulting image. I didn’t want to introduce features with questionable impacts, so I decided to leave them out completely.
Reflection
After spending weeks to prototype, port, and fine-tune Dissolution, I was very please to finally make the project available on 26 January 2022. Here you can see an overview of all 256 editions that were generated:
All 256 editions of Dissolution
After Dissolution was made available, I received some questions about the project and my artistic process. Thanks to HerosPraeteriti, Chef NFT, and IAmEd for providing the following questions:
Q: Is there anything that you wish you would have done differently now that the project is available?
Not really. I’m happy with the work as it is. I do have ideas about how the algorithm might be extended (curves, for example), but they feel like they’d be a fundamental change to the output structures, and so would probably be better served as a completely separate project.
Q: What was the biggest challenge in achieving the result that you wanted?
The biggest challenge that I faced, by far, was modifying my original algorithm. In Julia I could use (effectively) unlimited resources to create a result without a real time constraint. That wasn’t possible in Javascript - I wanted it to work reliably in multiple browsers and create a result in under ten seconds.
This was difficult for a variety of reasons. For one, the original algorithm used an opacity level of 0.0005 per rectangle, and drew hundreds of millions of rectangles as the algorithm was running. The final version I released capped the number of rectangles in a piece to ten million, each of which had an opacity around 0.01. This was not due to any WebGL technical limitation, but rather because I chose to pre-generate all of the geometry positions so that they could be batch rendered in one pass by WebGL. That’s a pretty large change, and it took some work to ensure that the subtlety of the original algorithm wasn’t lost during this transition.
Q: When you start a work, do you have a result in mind and work towards it, or do you experiment until you find something that you’re excited about?
While I wish I was the type of artist who could transform a specific vision into a final work, I’m actually the exact opposite. I almost never have a fully-formed idea that I’m trying to reach, and the few times that I have tried to implement “a great idea” the work that resulted was ultimately uninteresting and abandoned.
My typical process is to start with a square on a canvas and a vague idea of an algorithm or process that I want play with. I then iteratively experiment with various aspects of the algorithm to see what happens. It can easily be the case that I hate a work up until the moment that I make a change that redeems the entire effort.
Thank You!
Thanks so much for taking the time to read this post! If you have any thoughts or feedback you’d like to share, please feel free to contact me on Twitter or directly on this site.
I was specifically not referring to the process of sedimentary dissolution, which just so happened to be the name of another fxhash project that was released on 21 January 2022. 😅 ↩︎
I had been working on a different project, but had hit a wall with the quality level of the output I was able to reach with Javascript. I decided to take a break from that project and try something new, with the hope that I would have better insight into how to achieve my original goal once I had some time to think about it. The good news? The problems that I ended up having to solve in Dissolution ended up being the same as my original project’s, so I’m hopeful that I’ve actually killed two birds with one stone. ↩︎
This is what I’ve done to support my generative art prototyping process in Julia, for example. The Colors.jl and JuliaImages libraries make this a lot easier than it would be otherwise. ↩︎